You've got the item. A worn jersey, a signed guitar pick, a piece of merch from that video your fans still quote in the comments. Now what? Fanvault's listing flow takes you from zero to a live auction in a few minutes — and it's built to make your item look as good as it deserves to. Here's exactly how it works, step by step.
Start From Your Creator Dashboard
Once you're logged in, head to your Creator Dashboard. You'll see your storefront status, your referral link, and a big pink + List New Item button in the top right. That's your launchpad. You can also hit the Sell button in the top nav from anywhere on the site.
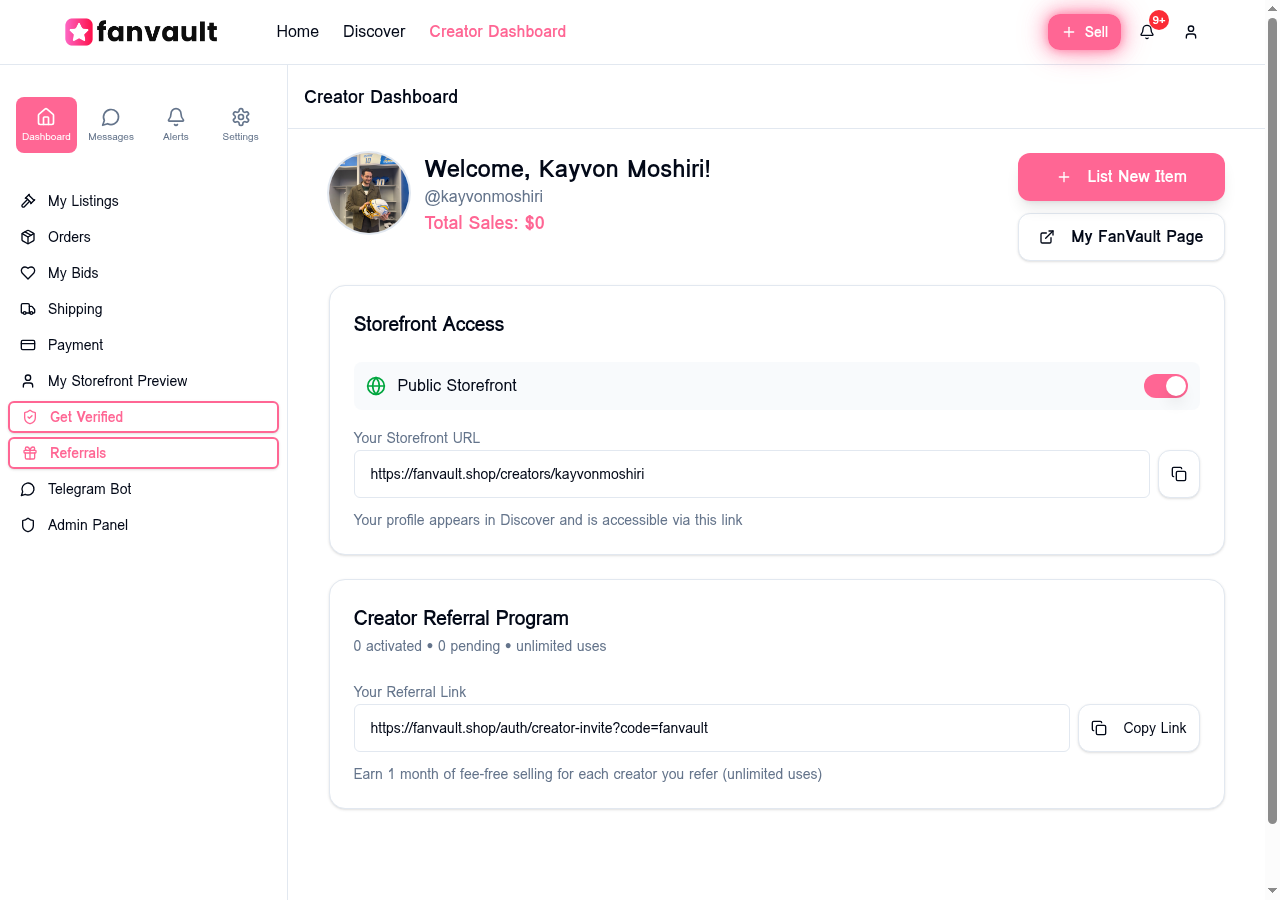
↑ Your Creator Dashboard — storefront toggle, referral link, and the List New Item button
Step 1: Content Link (Optional but Powerful)
The first step asks for a Content Link — a URL to the YouTube video, Instagram post, or TikTok where this item appeared. This is optional, but it's one of the most valuable things you can add. When fans can see the exact moment the item exists in your content, they're not just buying a thing — they're buying a memory. A guitar pick from your sold-out tour video hits differently than just "guitar pick."
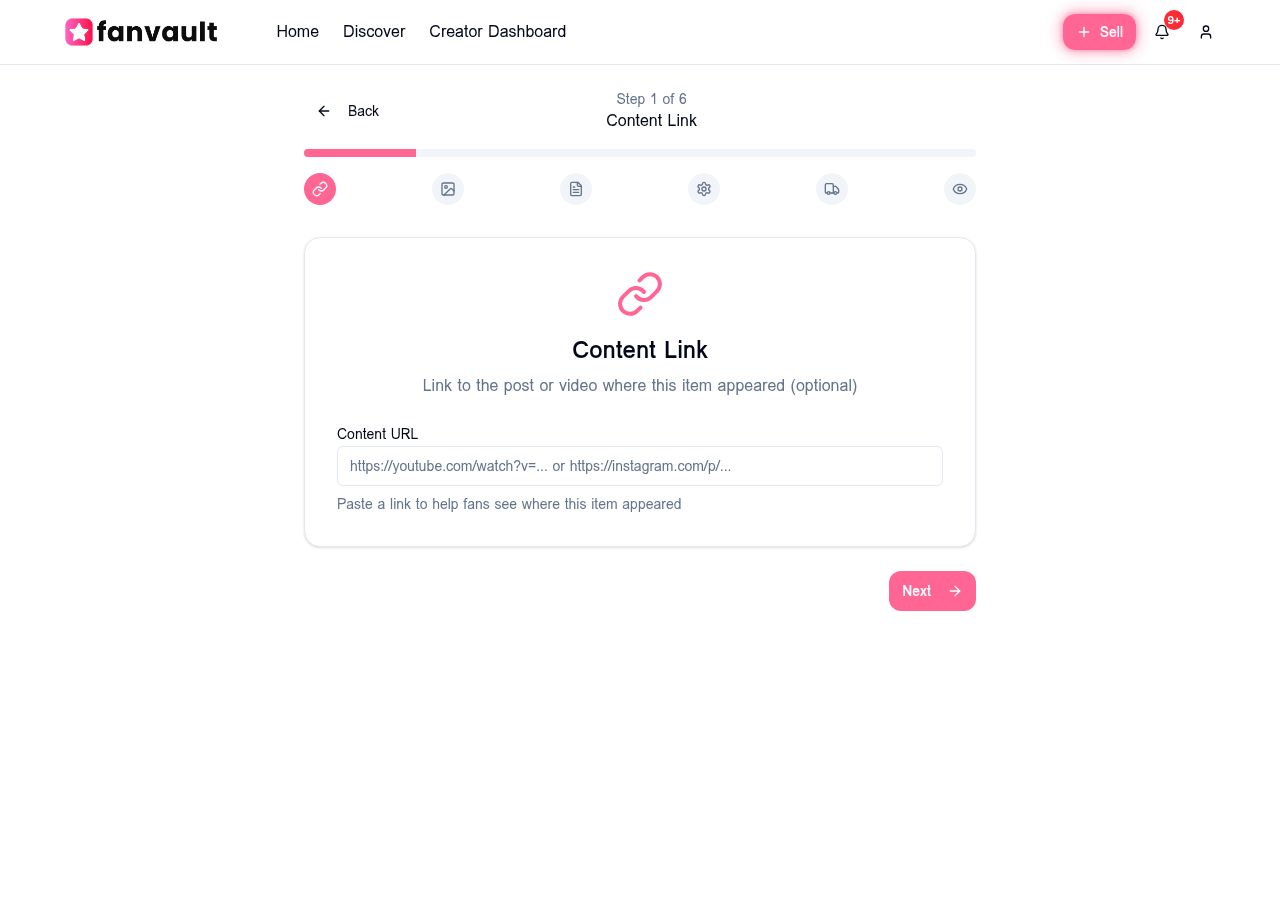
↑ Step 1 of 6 — link the item to your content for instant context
Paste in your YouTube, Instagram, or TikTok URL and hit Next. If the item didn't appear in a specific post, just skip it and move on.
Step 2: Upload Your Photos
Good photos are everything. Fanvault lets you upload up to 5 photos per listing, and the first one you upload becomes the main image that shows up on the auction card and in the feed. Take your time here — bright lighting, multiple angles, and a clear shot of any damage or wear will build trust with bidders and often drive higher bids.
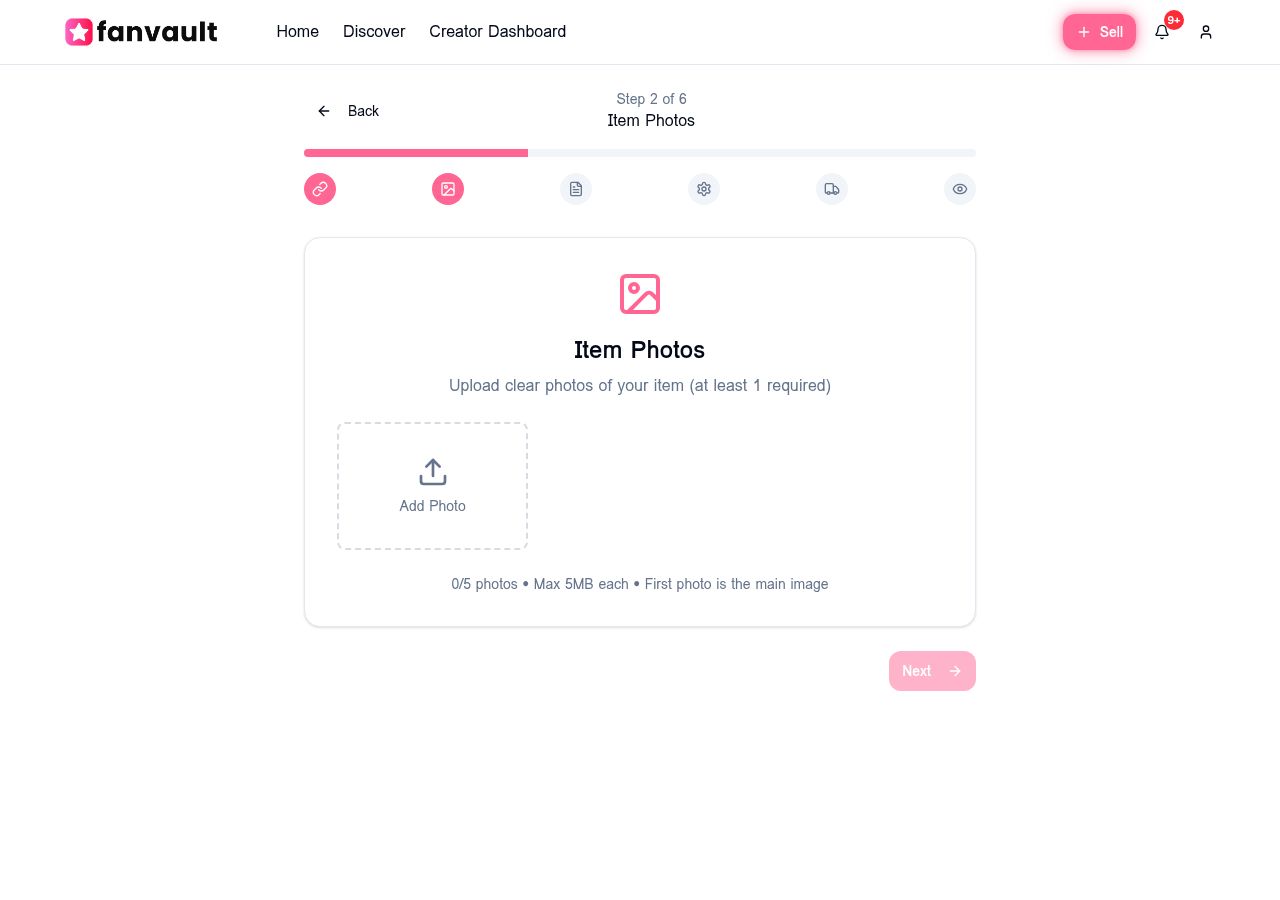
↑ Step 2 of 6 — upload up to 5 photos (max 5MB each, first photo is the main image)
- Max 5MB per photo
- Up to 5 photos total
- First photo = main listing image — make it your best shot
Step 3: Tell the Story of Your Item
This is where you bring the item to life. Give it a clear title (think: "Jacket from Summer Night video" — specific and searchable), then write a description that tells the story. Where did it come from? What makes it special? When was it worn or used? Fans are paying for the provenance — give them something to feel.
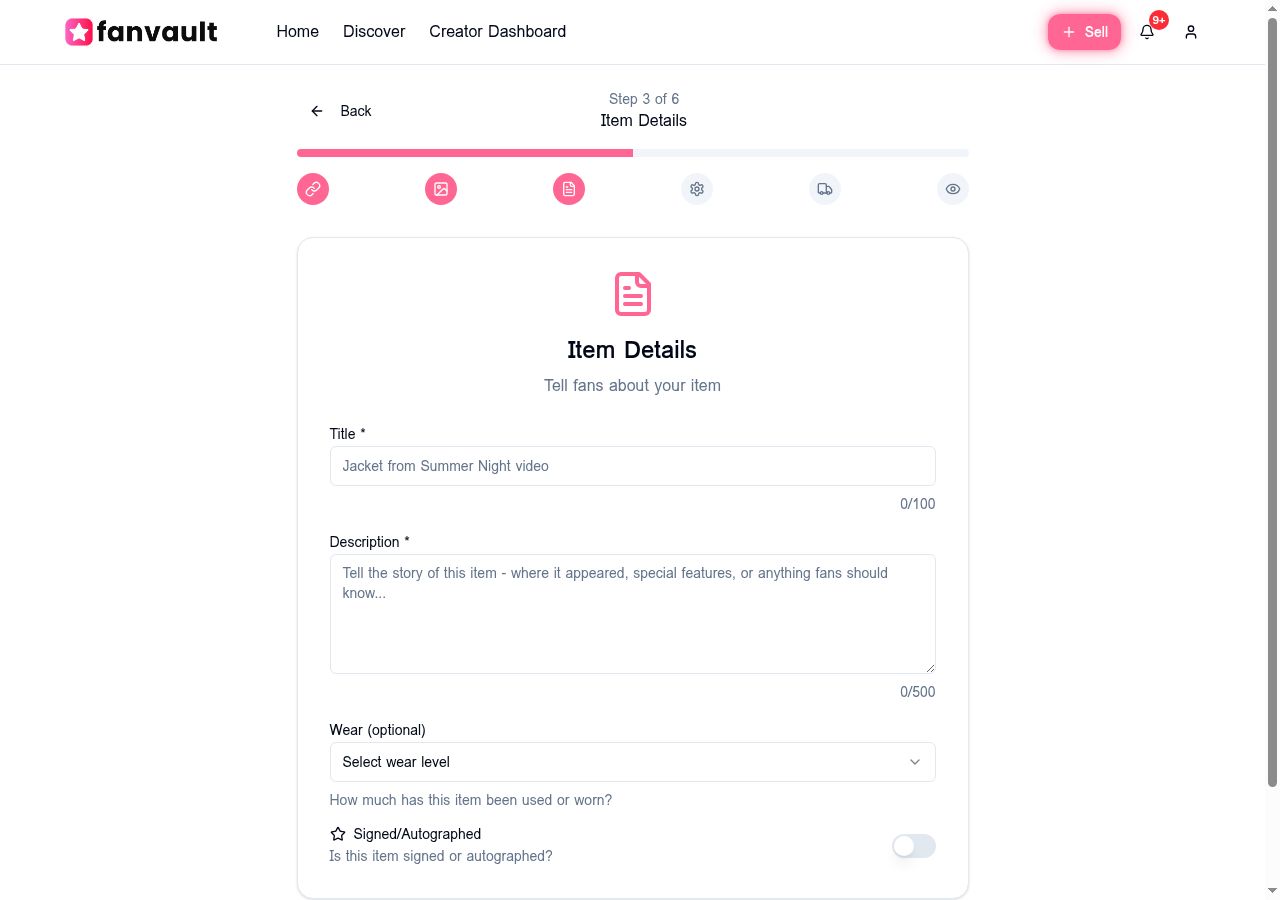
↑ Step 3 of 6 — title, description, wear level, and a signed/autographed toggle
You can also select a wear level (like-new, lightly used, worn) and toggle on Signed/Autographed if applicable. Signed items consistently attract more bids — don't forget to flip that toggle if it applies.
Steps 4–6: Pricing, Shipping & Publish
The final three steps cover how your auction runs:
- Auction Settings (Step 4): Set your starting bid, reserve price, auction duration (1, 3, or 7 days — or a custom window), and choose between auction or Buy Now mode. You can also enable auto-restart — if your auction ends with no bids, it'll automatically relaunch so your item stays in front of fans without any extra effort from you.
- Shipping (Step 5): Pick your shipping tier based on the item's size and weight. Fanvault handles the label generation — you just pack and drop it off. You can also opt into international shipping to open your auction to fans worldwide.
- Preview & Publish (Step 6): Review everything before it goes live. Once you're happy, hit publish — your auction appears in the feed and fans can start bidding immediately.
What Your Auction Looks Like to Fans
Once live, your item appears in the All Auctions feed alongside other creators' listings — with a real-time countdown, a LIVE badge, your starting bid, and your main photo front and center. Fans can browse, watch auctions they're interested in, and place bids with their saved payment method.
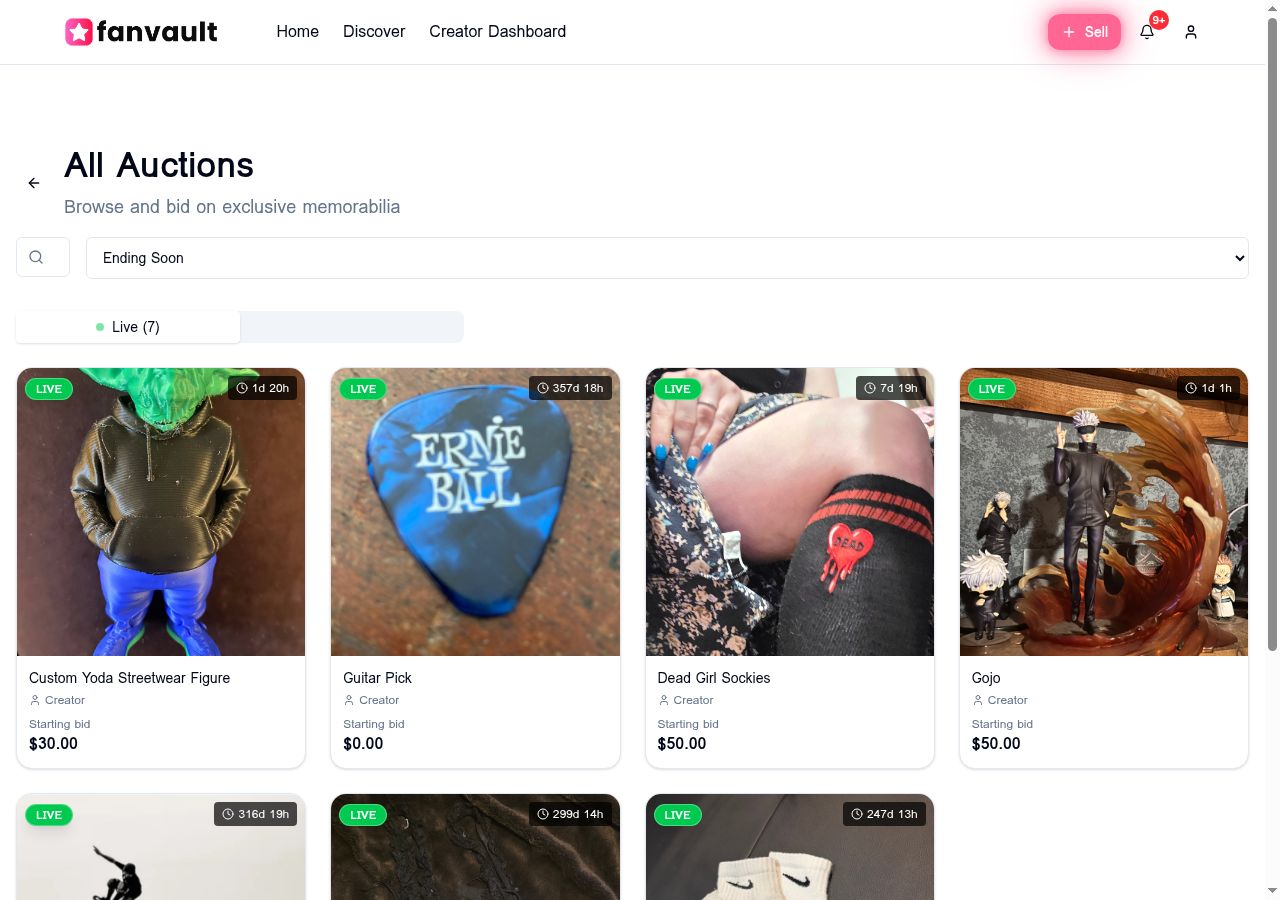
↑ The All Auctions feed — your item appears here the moment it goes live
One built-in feature worth knowing: Fanvault has anti-snipe protection. If a bid comes in during the final minutes of your auction, the timer automatically extends — so late bidders can't steal your item at the last second and you always get the fair market price your superfans are willing to pay.
That's all there is to it. Six steps, a few minutes, and your item is live in front of fans who genuinely want to own a piece of what you've built. If you haven't listed your first item yet — your dashboard is waiting. Go hit that pink button.